Showing posts with label tips. Show all posts

October 20, 2012

Upcycled Photography Tips - Part 1

Hi everyone. I'm Meredith and this is my first post! I run Ricefield Shop on both Etsy and our own web site, which is an outgrwoth of Ricefield Collective, a nonprofit cooperative that hopes to provide supplemental income to farmers in the Philippines through knitting and other crafts. As part of our efforts, we've partnered with a family-owned company called Yadu, which makes bags out of upcycled clothes, to design and create a collection for our shop. I spent several weeks last summer sourcing fabric, designing, and cutting to make our bags along with the wonderful workers at Yadu.

One other thing I've done is get an MFA degree in Photography, which is coming in handy as we try to show off our products in the best manner possible on Etsy. This post offers some of my tips to help members of our team to show off their wares in the best possible light.

There are a bunch of tutorials out there about how to generally photograph items on Etsy. If you haven't yet, definitely check out the Product Photography Introduction on the Etsy Blog. I'm going to focus here on some good ways to photograph upcycled products, both from my experience and from observing some of the other members of Team Upcyclers.

I've been coming up with an evolving list of challenges for photographers of upcycled products. Out of all of them, this is the one I find myself grappling with the most:

Challenge #1: Upcycled Products Don't Look New
No matter how you cut it, the raw material for upcycled products come from sources that have been used. They won't always have the shiny appeal that new products do, but there are many ways that you can make them look attractive nonetheless.

Solution #1: Create an environment for your shots.
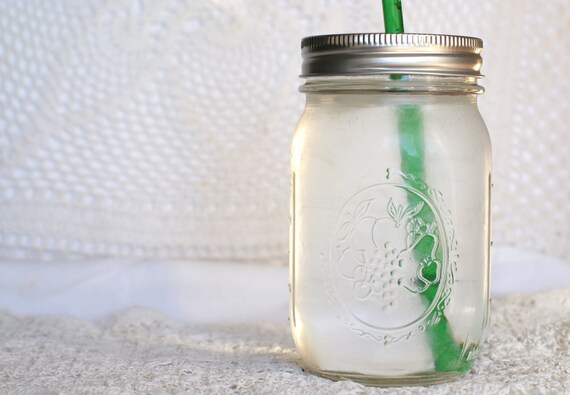
When I first started photographing our products, I thought that a plain white background would work best in terms of giving people a clear picture of the product. However, I found that it became important to situate our products in a setting. New things look better against a blank background because they don't have the flaws of use. What I've been learning is that upcycled products work best when they're presented as part of an environment. Here are a couple of examples from our fellow team-members:


This image does a really fantastic job of both allowing us to imagine the product in an environment while also keeping the background clean enough to highlight the product and be easy to include in treasuries. Seeing this picture makes me think of having this chandelier on my porch on warm nights, and that image makes it more compelling for me to buy the product.

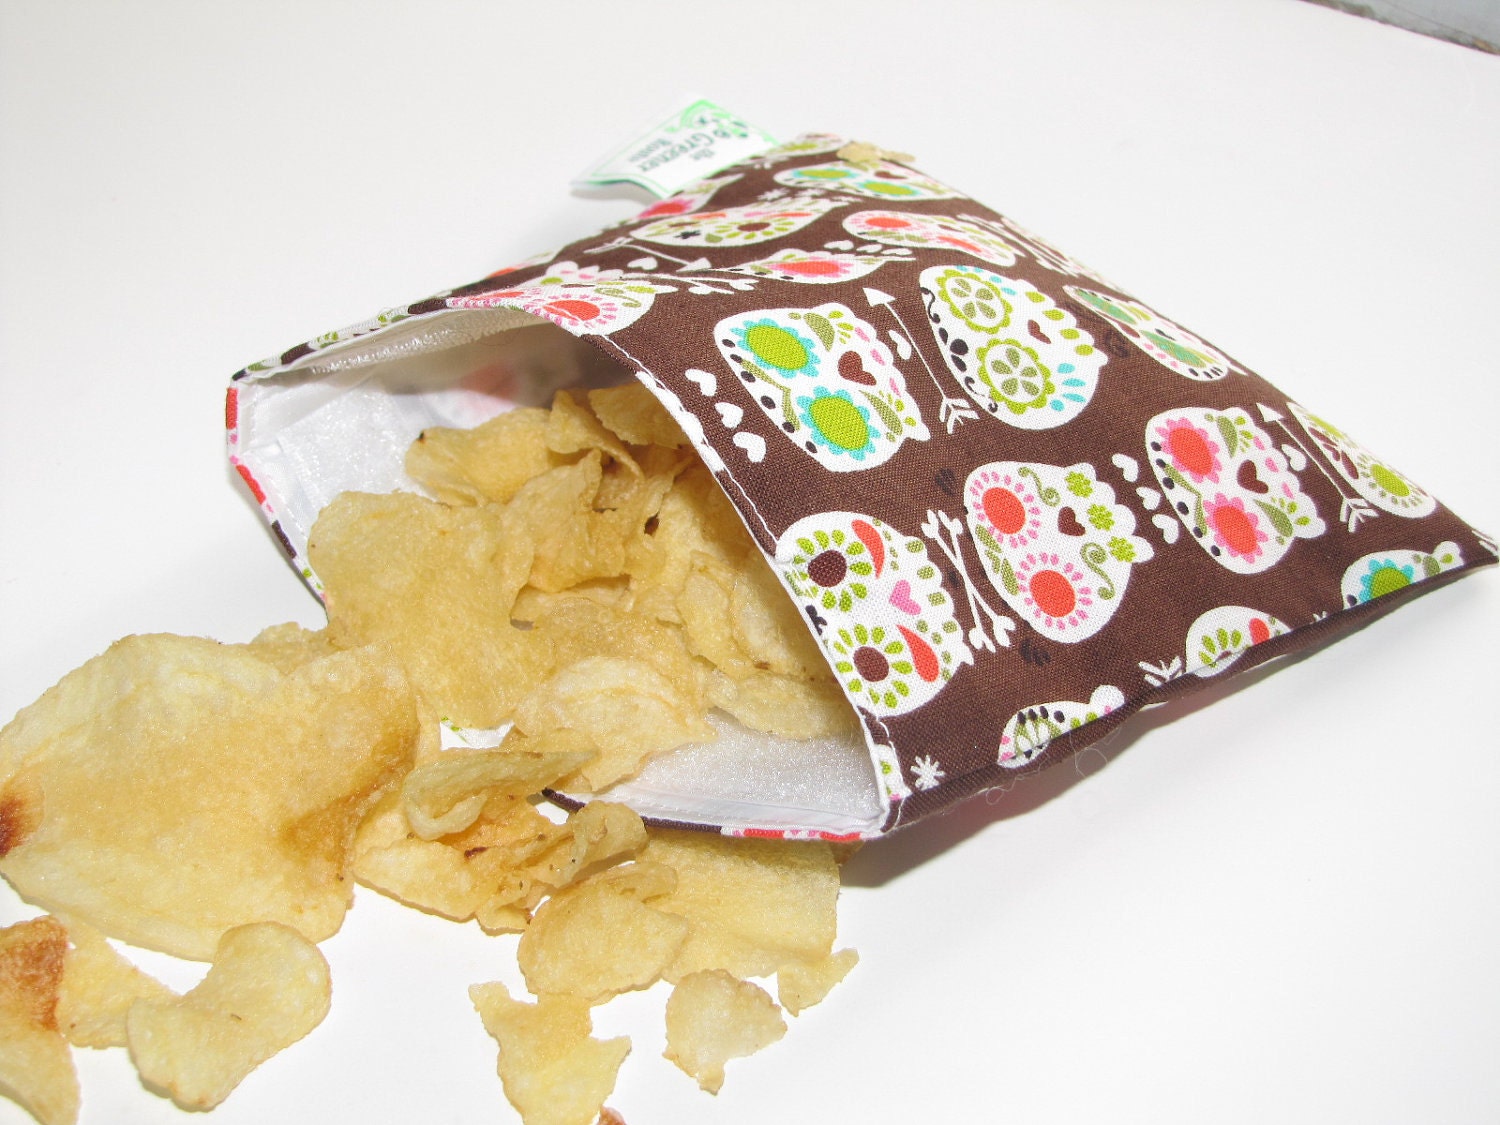
At the same time, you don't necessarily need to have a super-fancy background all the time to produce compelling images. The use of charming ways to situate your products against a white background can go a long way in terms of making your product distinctive and give your customer a sense of how the product can be used. For instance:


Simply by putting this upcycled school dress--made from a men's shirt--on a clothing line, KallioNYC evokes images of doting mothers hanging up their kids' clothes, immediately making the shirt more attractive.

Solution #2: Package items well.
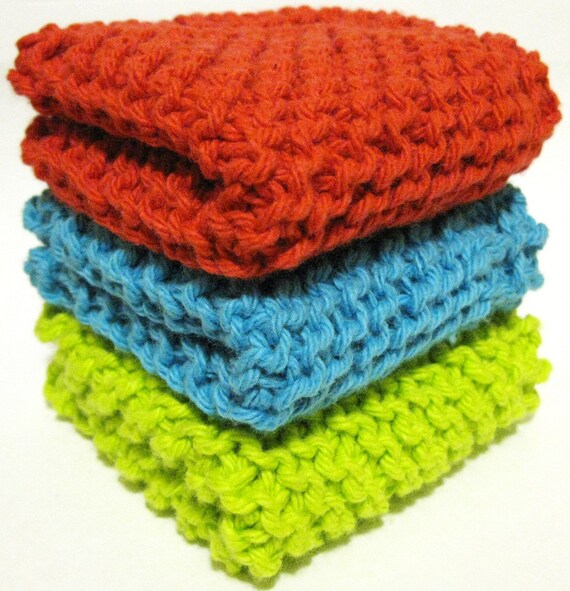
Though not strictly photography-related, one solution I've seen some people use is to have tags and ribbons on their products that reinforce the idea that even though the product is upcycled, it's been remade and therefore rebranded, or else they package their product in such a way that mimics a new product. I find this works particularly well for reclaimed products that can be used for raw material to make other things. Here's an example of a shop that does this extremely well:


The simple act of winding reclaimed yarn into wonderful skeins that look familiar to any knitter gives a potential buyer the sense that they're buying a product that matches the quality of new yarn. So if you're selling upcycled jewelry, maybe think about photographing it with a reclaimed jewelry box. If it's a figurine, maybe it would look better in a glass case. Whatever scheme you come up with, giving the potential buyer visual signs that what they would be getting would be of the same quality as a new product is never a bad thing.

Solution #3: Highlight nifty and creative details of your products.
One of the ways that upcyclers elevate their products is by reusing material in unexpected ways. It's important to make sure that you highlight really cool aspects of your upcycled goods, and awesome details that make your one-of-a-kind product special. For instance:


While this bowl is an awesome object in and of itself, this photograph highlights the button detail that's photographed in exactly the right place: not so far to the side, but not smack dab in the middle to make it too symmetrical. This kind of attention to detail in the product photography allows this bowl to be seen in the best possible light.

A Final Reminder: Every detail is visible, so take the time to prepare your products.
Because I photograph bags mostly, the steamer and the lint brush are my best friends, and ours is a constant battle to keep our products wrinkle and lint-free. I'm sure you have your own struggles, but it's important to keep in mind that details that seem inconsequential to the eye show up much more clearly in a photograph, and it's much better to use a lint brush than have to clean an image up in Photoshop.

Next time, I'll be offering photographic solutions for another challenge of photographing upcycled goods. We love that they're one-of-a-kind, but it means you have to shoot each item one by one. How can we make that easier?

Also, I welcome photography questions and ideas for photography-related issues you might want me to cover. Maybe I can even collaborate with one of you to help improve the photography in your store!

Until next time,
Meredith from Ricefield Shop

January 18, 2012

Wasteless Wednesday!

Better known in the Twitter world, but quickly gaining momentum elsewhere is a new green trend tagged #WastelessWed for Wasteless Wednesday! It's a movement to take pause for one day to reflect on how we can find ways to waste less and save resources. To help you find easy ways to achieve this, we will offer you a week's worth of tips each Wasteless Wednesday right here on Love 2 Upcycle! Let's work together to Waste Less!

1. Of course, no self respecting leader of a team called Upcyclers would miss the obvious first tip: Support the upcycling movement by either purchasing upcycled products or creating your own! Products created by our team can be found by searching Etsy with the tag: teamupcyclers.


2. Pack a green lunch! Use a lunch box or tote to carry it and use reusable bags instead of plastic.

Greener Route

3. Use a reusable To-Go Glass or Cup!

Poppy and Pearl Co.

4. Don't grab a paper towel to wipe up~ grab a washable dishcloth instead.

Stagnant Gypsy

5. Here's another sustainable way to wipe up a different kind of mess {yuck!}, or just their runny noses~ Reusable baby wipes or as Sweet Memories Quilts calls them: Organic Bummy Wipes!


6. Use recycled business cards. These are printed on post-consumer packaging!

Vintage Script Press

7. Bring your own bag to the market~ We're begging you!

In(c). factory

Tune in again next week for another week's worth of ways to Waste Less!

April 22, 2011

Love 2 DIY on the Weekend: Last Minute Gift Idea!

Easter's on it's way! 

And with everything you have to remember on your to-do list for any holiday or occasion, there's always a chance you'll need a last minute gift. Whether it's for someone special you want to show some love to or maybe a hostess gift, this little jiffy quick idea is perfect. And it even has a some WOW factor because they will think you are sooooo clever! This project is also easy enough for a child to do, so it can even be a gift they can make for Mother's Day~ which is also on it's way!

Now, I can promise this is a quick idea because I made these after working all day, (which is why this post is late) shopping for my Easter dinner and making supper! WHEW! So trust me when I say it's easy.

Start with these wonderful bags of candy in a favorite flavor, or choose based on the color of the bags, like I did. (actually, for me the flavor doesn't matter, I love them all!)


Carefully open the bags and remove the candy. I decided to use the Lindor Truffles for this DIY, because I liked the little window and thought it would be perfect to personalize the gift with a picture. Cut the bag just below the glued area where it was sealed. You can trim it lower if you want, I did it a couple of ways. It might depend upon what the label looks like!


Find or print a photo that will fit the window, size it to be sure, trim if necessary, but leave enough at the top and bottom to add double stick tape to adhere it to the inside of the bag. Next find some coordinating ribbon to make handles. Cut them about an two inches longer than you want the handles to be, 8 inches works well. I like to have a finished edge, so I added a little double stick tape to the "wrong side" of the ribbon and folded it over. Next, put some of the tape on the ends on the right side and stick to the inside edge of the top of the bag to make handles. On one, I put the ribbon on the outside and added little rhinestone flowers over the ribbon. Then, I added a silk flower with a brad, by poking a hole in the bag and fastening it. Of course, any embellishments will work!


Now you have a beautiful upcycled gift bag! Just add some tissue, put the candy back in and Voila! A last minute gift that's sure to please~ and it's affordable, lol~ especially, if they are on sale and you have a coupon like I did! Here's this one finished:


You can change it up all sorts of ways, using whatever you have on hand~ be creative! And if you can't resist eating the candy, just use it as a gift bag for any little treasure. It can be altered to any holiday, just by dressing it up for the occasion!


Hope you enjoyed our DIY for the weekend! Don't forget to enter this week's giveaway~


Happy Easter!


February 22, 2011

The 5 Best Tips We've Ever Been Given, Period.


Here at the Mistle and Toe camp, we love all things eco and upcycled! But how do we share that with others, and be successful in doing so? Well we are still learning as we near our 6 month mark, but here are the best tips we have been given throughout this experience. We hope they come in handy for you too!

1. Tell your story. We love a good story, and as upcyclers we find it critical to helping people understand just what "it" is and why "it" is something unique, creative, and a small piece of world-saving wonder. Telling your story isn't just about relating to people virtually, it's about helping them understand the who, what, where, and most importantly the 'why' behind you and your creations. We know all the big marketers are talking about storytelling as a "tool", but we think it something more like a necessity to the handmade, and especially the upcycling, World.

2. Photos That Shine. We admit, we have not yet mastered this, but boy when we started improving our photos did we see a difference! We were in a LOT more treasuries, and even got more pageviews of our new and improved look. There are some great tips out there for creating reflective surfaces with aluminum foil, and making your own "studio" out of poster board. This is one simple and almost no cost improvement, and if you have multiples of products it will save you a ton of time to photograph them once the right way. So consider your products and if they would do best on their own with the white-on-white combo or if colors and context settings will help, like props or "showroom" style photos.

3. With Love. People buy handmade for a great many reasons, but one of the top reasons is because the items are made with lots of love and care by the artisans themselves. So make sure when it arrives that there is a little Thank You note and it is wrapped in a way that reflects your store. We like to use 100% recycled kraft paper with found pieces of yarn to keep the impact low, reusable, and to reflect what we are all about. Some of our favorite Etsy purchases rose above the rest because of this simple act. Make them feel appreciated and they will return the favor.

4. Stay Positive. These past few years the global economy has seen the best of times and the worst of times, but staying positive and upbeat about the future and the positive difference your creations are making is really important. From Forums to Product Descriptions, there is a large and public community out there that is eager to get to know you, make sure you don't turn them away. Sales may be slow, or they may be skyrocketing, but either way you have one incredibly special thing that most other people don't. Your own little slice of heaven aka your store. Where you make the rules, you make the products, and you create the inspiration for personal decor, fashion and gifts. So keep in mind that you are sharing a piece of yourself, make sure you are putting your best foot forward, every time.

5. There Is No Such Thing As Failure. Just learnings. If something doesn't sell...at all... then you have just learned something. The "what have I learned" can be a little trickier. Is my product not "pretty" enough? Is it overpriced? Is the market saturated with similar items? Are people finding my site? Make sure you start asking questions, before you start getting down on yourself. There is so much to learn throughout this experience, and being open to learning is key in creating a successful shop. We recommend some of the forums that offers shop critiques to see things from an outsider's perspective. So stay positive and stay open!

One extra tip: Sign up for google analytics. You will not be sorry! You can see what search terms are used to find you, what products people visit the most (we know, this is on Etsy too...but wouldn't it be great to know if after you posted something on Facebook and Twitter how many people went and looked at it?), and how many unique visitors your site has every day. It may seem overwhelming at first, but there are plenty of help guides out there to get over this hump and start to really get to know your potential customers!

Best of luck and Happy Upcycling!
Tiff & Sarah at Mistle and Toe
http://www.etsy.com/shop/mistleandtoe