Showing posts with label projects. Show all posts

May 26, 2013

Love 2 DIY on the Weekend: Summer Projects!

Summer is great for sun and fun, but it's also the best time of the year to get your DIY on! Here are tons of different projects you can tackle every weekend this Summer!


Repair the World~ DIY Summer - Eco-Friendly Projects for Everyone

30 Days of Easy Summer DIY with Bob Vila

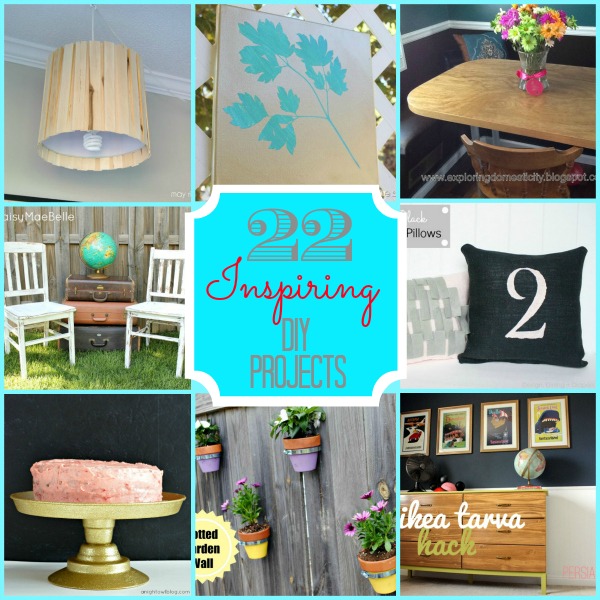
Great Ideas~ 22 Summer Decoration, DIY and Inspiration Projects!


33 DIY Ways to Have the Best Summer Ever from BuzzFeed


15 Outdoor DIY Projects for Summer from Arpartment Therapy


DIY Fun Summer Projects On Pinterest from Christina Tran


August 24, 2011

A Soy Candle Tute~ from Upcycled Stuff

We're looking forward (especially me, lol!) to the return of Valerie's weekly series, 'Meet and Greet' on Sept. 7th, but for now we are very grateful to Tricia from Upcycled Stuff for her guest post!

 Preparing for Soy Candle Making

A while back, on my blog~ Upcycled Stuff,  I promised a soy candle making tutorial.  Well, I have taken my time to really find the most efficient and earth friendly way to present this overwhelming amount of information.  In fact, I find it so overwhelming that I will be presenting this tutorial in a 2-part blog.  In order to incorporate your upcycled elements you will have to do a bit of work to gather your supplies so I thought that I would start there.


Pure soy candles have a very low melting point.  That means that, unlike paraffin, the entire top of your candle becomes a pool of melted wax when the wick is burning.  For this reason, pure soy candles need to be housed in a container.  This is the fun part!

Start collecting glass containers from anywhere you can find.  In the picture to the right you'll see that I have a B&M baked bean jar, sake cups, water goblets and some miscellaneous heart shaped containers.  Most of these were yard sale items and many mismatched pieces that wouldn't find much use elsewhere.  A word of caution when selecting your containers:  If you pick clear glass, I recommend selecting glass that is textured.  Why? Wet spots will happen, even in soy candles sold in retail stores.  Don't worry, there is nothing wrong with your candle and it isn't actually wet, it will just look like the wax didn't ever dry in one spot.  It isn't very pretty and it will bug you, the texture disguises it.

You'll also want to start collecting containers for mixing and melting your wax.  Soy wax is super easy to melt in the microwave....yes, the microwave!  So hit the thrift shops and yard sales in pursuit of large glass measuring cups.  You can not only melt your wax in these but they are easy to pour from as well.  Plastic will start to deform as it holds that hot liquid so definitely stick with the glass.


I found it easiest (after trying many different methods) to melt all of my wax in one container and then pour it and any essential oils in separate containers.  The containers that I chose were upcycled as well.  I saved coffee cans and other large tin food containers.  Be very careful that you take a minute to file down the sharp point that is formed at the location where you snapped the lid off.  It is really sharp and you'll feel it when you're cleaning up.  The cans are also really easy to tap with a hammer to form a pouring spout, kind of like the one on the coffee can to the left.

What else will you need? Head over to 'Upcycled Stuff' to find your "shopping list"! 

Tricia promises to meet us back here this weekend for Part 2, so get your supplies together and we'll see you soon!

June 28, 2011

How~ Tuesday! A Tute from The Chic Pea!


Raise your hand if you have an old Hawaiian Lei kicking around that you're saving for the next time somebody happens to invite you to a luau!  Or maybe for the next time you go on a tropical vay-cay? Perhaps you are better at not being a pack-rat than I, but a few of these faux-bits of the tropics have hula-ed their way into my pile of not-very-useful things.

 As I'm cleaning out my house and getting ready to move, I came up with this lil DIY to share with you.

...and you know I love a good Flower Crown!


Now just hula your way over to my blogspot, The Chic Pea, and I'll show you "How-Tue" make it!


Oh, and here's a little peek at my shop on Etsy~

May 20, 2011

Love 2 DIY on the Weekend: 30 Days~ 30 Things!

Magdalena Akantisz and Lisa Schulz, students of the University of Applied Arts of Vienna, devised a brilliant plan for an upcycling project~ 30 Days, 30 Things. Their intentions were to "design beautiful and useful things for 30 days in a row", but promised to extend the project further if others contribute as well. They are now on Day 36, and since we Love 2 Upcycle~ we hope the project continues long into the future!

Here are just a few "Days":


And the latest entry~ Day 36:


Would you like to collaborate with these innovative, upcycling students? Contribute a project to keep the "Days" coming~ And help the planet at the same time!

May 16, 2011

Monday's Makeover: What's New?

Our team has grown exponentially on Etsy~ and we're thrilled! We believe there is strength in numbers and spreading the word about upcycling is easier when more are sharing the news! So in appreciation, here are a few "makeovers" by some of our new members!

Adorable booties upcycled from a recycled dress by ReFabricates~


Plush Stegosaurus created with reclaimed fabrics, vintage trims & buttons, stuffed with upcycled plastic shopping bags by Leftz~ One-Eyed Eco Plush


This is the tops~ for the cake, that is! A vintage Bride & Groom dressed up by A Vintage Bride~


In honor of the biggest wedding of the year, here's a pillow created from a souvenir silk crepe hanky from another momentous occasion in Great Britain, the coronation of Queen Elizabeth fluffed and trimmed with pom-poms by HuntedandStuffed~


And how about a bouquet made of Kusudama Flowers to throw? These beauties are created from recycled literature by Parchment and Patches~


For more creations from our members you can check out our Galleries or our Treasured pages here on our blog~ Or visit us on Facebook for UPdates about our members' listings, promos and Upcyclers' news!

May 15, 2011

Love 2 DIY on the Weekend: Gardening~ Upcycled Style!

An Upcycled Herb Garden... Anywhere

This is my favorite time of the year!  If I could be in the garden all day, I would be.  I've added two flower gardens to my yard, decked out the patio and have quite the vegetable garden growing in the field behind the house.  There's not a lot of room left to do much more, but I found a way and thought I'd share it with readers.   Yep, that's it over there on the left side of the page.  I love how rustic it looks and that I can put it anywhere.


Head over to Upcycled Stuff  to see how to do this project yourself!


Be sure to check out Upcyclers member, Upcycled Stuff on Etsy, too, where she turns yesterday's trash into tomorrow's upcycled treasures; unique one of a kind jewelry, art and accessories that are all environmentally friendly! Upcycled Stuff will donate 10% of all shop sales to the Jane Goodall Institute for their continued work to conserve chimpanzees and their habitat.


April 25, 2011

Monday's Makeover: From Broken to Bling!

Ann Marie's blog and shop is aptly named: Very Creative Creations! She entered this creative creation in the recent Green is Universal contest, The Art of ReUse. And even though it's a bit early (or late?) for Christmas, this is an idea you might want to file away for later this year. You could also change it up to a flower bouquet design or maybe a another kind of tree... hmmm~ now I'm feeling very creative!


Material List: old picture frame (garage sale find), broken costume jewelry, scrap of velvet, pieces of cardboard and glue.


This upcycling project is relatively easy but time consuming to make.

1. Cut a piece of cardboard to fit the opening of your frame.
2. Cut a piece of velvet about an inch larger than your piece of cardboard.
3. Glue velvet to cardboard with fuzzy side facing out.
4. Place velvet covered cardboard into the frame.
5. Lay out broken costume jewelry into a Christmas tree form.
6. Start gluing jewelry pieces into place.
7. When finished gluing all the pieces in place let piece dry over night.
8. Cut a second piece of cardboard to fit the back of frame.
9. Glue cardboard into place and let dry over night.


Now display your Recycled Christmas Bling.  Set up your upcycled Christmas tree and enjoy all year round.


Here are some other 'makeovers' by Ann from her Etsy shop~


Have a DIY or Makeover idea to share? We'd love to feature it, just drop us an email:
teamupcyclers@gmail.com and we'll be in touch!

April 22, 2011

Love 2 DIY on the Weekend: Last Minute Gift Idea!

Easter's on it's way! 

And with everything you have to remember on your to-do list for any holiday or occasion, there's always a chance you'll need a last minute gift. Whether it's for someone special you want to show some love to or maybe a hostess gift, this little jiffy quick idea is perfect. And it even has a some WOW factor because they will think you are sooooo clever! This project is also easy enough for a child to do, so it can even be a gift they can make for Mother's Day~ which is also on it's way!

Now, I can promise this is a quick idea because I made these after working all day, (which is why this post is late) shopping for my Easter dinner and making supper! WHEW! So trust me when I say it's easy.

Start with these wonderful bags of candy in a favorite flavor, or choose based on the color of the bags, like I did. (actually, for me the flavor doesn't matter, I love them all!)


Carefully open the bags and remove the candy. I decided to use the Lindor Truffles for this DIY, because I liked the little window and thought it would be perfect to personalize the gift with a picture. Cut the bag just below the glued area where it was sealed. You can trim it lower if you want, I did it a couple of ways. It might depend upon what the label looks like!


Find or print a photo that will fit the window, size it to be sure, trim if necessary, but leave enough at the top and bottom to add double stick tape to adhere it to the inside of the bag. Next find some coordinating ribbon to make handles. Cut them about an two inches longer than you want the handles to be, 8 inches works well. I like to have a finished edge, so I added a little double stick tape to the "wrong side" of the ribbon and folded it over. Next, put some of the tape on the ends on the right side and stick to the inside edge of the top of the bag to make handles. On one, I put the ribbon on the outside and added little rhinestone flowers over the ribbon. Then, I added a silk flower with a brad, by poking a hole in the bag and fastening it. Of course, any embellishments will work!


Now you have a beautiful upcycled gift bag! Just add some tissue, put the candy back in and Voila! A last minute gift that's sure to please~ and it's affordable, lol~ especially, if they are on sale and you have a coupon like I did! Here's this one finished:


You can change it up all sorts of ways, using whatever you have on hand~ be creative! And if you can't resist eating the candy, just use it as a gift bag for any little treasure. It can be altered to any holiday, just by dressing it up for the occasion!


Hope you enjoyed our DIY for the weekend! Don't forget to enter this week's giveaway~


Happy Easter!


April 8, 2011

Love 2 DIY on the Weekend: Towel Wrap!

I don't know about the rest of you, but I use two towels after every shower. One for me, and one for my hair! Years ago, when I lived in Jersey I found this amazing product called a Turban Towel! It's the size of a large hand towel and it keeps my wet hair up until I'm ready to tackle it.


That was about 10 years ago, and my Turban Towel is full of holes. I found some copy-cats at the dollar store but they were not the same.


Sometimes I wonder why it takes me so long to realize I can make something I want, instead of endlessly searching at Target!


All you need for this project is
an old towel (any size)
thread for sewing (sewing machine or needle will do!)
a small piece of scrap ribbon (3-4")
and a button!


Fold the towel in half longwise. You are going to be cutting it in a curve, so it would probably be best to mark the towel first. The end wrap should be approx 26 inches long.

The best way for me to describe it is like when you are going to cut a heart of paper so you fold it over and cut that curve at the top and then to a point at the bottom - except the open part is the straight part where the fold would be on a paper heart.

Here is a horrible pattern I created on Excel and Picnik.com but hopefully it gives you a better idea.
To save on a ton of sewing, the straight piece in the pattern is the edge of the towel. This way your end product will have a nice finished look.


Pin the towel with the ribbon folded in a loop on the inside. Up at the top of the curve.


Sew the one seam! I backstitched over the ribbon several times.

Add the button with needle and thread at the pointy end of the towel. Twist the end with the button up to the ribbon loop and secure!


These are perfect as hostess gifts! If you have someone stay at your house, leave out a towel wrap and then let them take it home! They will use it for years!


About the Author:
Sammi is a creative starter who loves to help others do the same. She always has several projects going at once and loves to boss people around. So she had three children. You can find her on freckleLips or a soccer a field in middle America.

March 21, 2011

Monday's Makeover!

Mary, Mary, quite contrary~ How does Your garden grow? With the first official full day of Spring in bloom, it's time to finally head outdoors and enjoy the sunshine. But what if your space isn't so inviting...Neither were these, until a little makeover magic took place~


From MyHomeIdeas.com, this "Peaceful" space was featured in their Amazing Home Makeover Series~


And here's an upcycling DIY makeover project from Studio G~


If you really feel like taking on a DIY doozie~ try upcycling some pallets into an outdoor seating area! Upcycling guru, Wendy Tremayne will walk you through it in her tutorial~


Have a great idea for a garden makeover or upcycling project? Share it with us here or check out our Facebook page and share there!