March 25, 2011

Love 2 DIY on the Weekend: And Enter Giveaways!

Wanna have some fun? Wanna have the chance to win 5 upcycled prizes??
 I decided to let you guys have the chance to win what I make this week! At the end of the tutorial you can comment to enter.

Today I'm going to teach you how to make fabric flowers that can be used 100's of ways. It only takes about 10 minutes to make one (less if you have no children distracting you) and they are a fantastic way to use up all of those scraps you just can't throw out.

These are the materials I started with - a vintage pillowcase, a sleeve from a jersey knit shirt, and a pant leg from a pair of satiny polyester pants. Later, I decided to add a flower made from yarn because it's too difficult to roll and twist and glue a flower while taking pictures. Yarn just lays there.


Any scrap material will work!

These directions are for smallish flowers - adjust according to the size you would like.

Cut a 2 to 3 inch circle for the base of your flower out of a heavy duty muslin or other scrap material. It doesn't have to perfect, just a quick snip of the scissors.

Next, Cut a strip of fabric to make your flower approx 2 1/2" wide and 8 inches long.
Put a stripe of glue on an 8 " edge on the wrong side of the fabric.
Roll the fabric starting with the 8" edge that does not have glue until it is completely rolled. Press the tube so the glue adheres from the top to bottom of the tube.


Play with all sorts of materials

With a yarn flower, the yarn should be approx 12-14" in length, it wraps tighter and is narrower.

Cover your muslin circle with glue. Press one end of the tube of fabric or yarn to the center of the circle. Twist the tube and you lay it in a circular motion starting in the center.


With fabric be sure to twist the tube AND lay it in a circular motion

It takes a minute for even the tackiest glue to dry, so I pinned the tube of fabric to itself with a straight pin and let it dry overnight to make sure it was sturdy.


Not a sewer? A safety pin or clothespin would work too

For the center of the flower your choices are limitless. You can use buttons, beads, a circle of another fabric, or even vintage earrings as I did.

I filled the center with glue and pressed the earring rather firmly.

Lastly, I trimmed any muslin that could be seen from above.


Four unique flowers

I love the way these turned out - and you can see with the different materials how you could play around and make them uniquely yours.

Thanks so much for reading that tutorial even though you really only came for the giveaway! It's finally time for the fun stuff! Not only will one lucky winner get the 4 flowers I made for this tutorial, but the flowers will be inside the Ribbon Spool I made last week! 5 prizes and 6 chances to win! Please read the rules carefully and get to entering!


Yes! This could all be yours!

Each comment only counts as one entry, so if you are entering multiple times you must comment separately.

FIRST entry: In the comments below, tell me how you would use these flowers.

+1 Follow Love2Upcycle.blogspot.com - must be a new follow.
+1 Follow Love2Upcycle on facebook - must be a new follow.
+1 Post on YOUR facebook about this giveaway - please leave a link to the post.
+1 Follow @Teamupcyclers on twitter - must be a new follow.
+1 Tweet about this giveaway - please leave a link to the post.

Copy and paste this sample, or write your own, but be sure to include the link to this post!
@Teamupcyclers is having their 1st giveaway! http://tinyurl.com/6f7h537 Comment on the blog post to enter! #upcycled #giveaway #etsy

Good luck! The winner will be announced March 30th - Just in time for an Easter treat!
Sammi


March 23, 2011

Meet & Greet: Satrngrl

Lexan loves items that are used in ways that were not their intended use.

Her favorite material is Plarn. What is "plarn", you ask? It is yarn that is created from plastic shopping bags (also old VHS tape or cassette tape). The vast majority of her creations are one-of-a-kind and totally unique.

The main mission of her shop is to repurpose and upcycle/recycle items that most people just throw away.


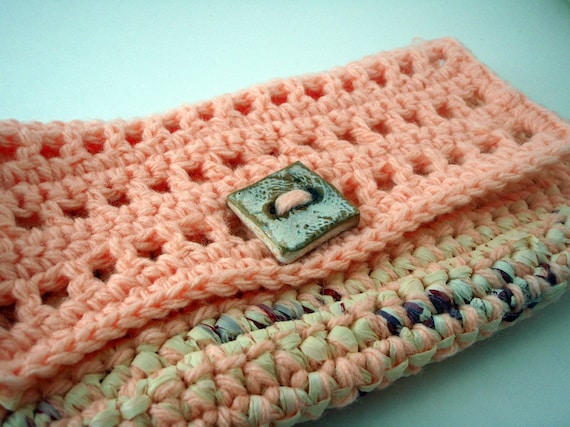
Peachy Salmon and Cream Plarn and Yarn Clutch

I asked Lexan a few question about herself and her business and here is what she had to say:

Tell us a little about yourself and what you sell
My name is Lexan, and I am The Lime Grasshopper (my shop is named after my 14ft. lime green sea kayak, Lime Grasshopper). By day, I run a silk flower facility. By night, I craft little ditties of upcycled goodness. Most of the items in my shop are created from upcycled and repurposed goods, like plastic grocery bags, computer parts, and yarn that may have otherwise been thrown out.


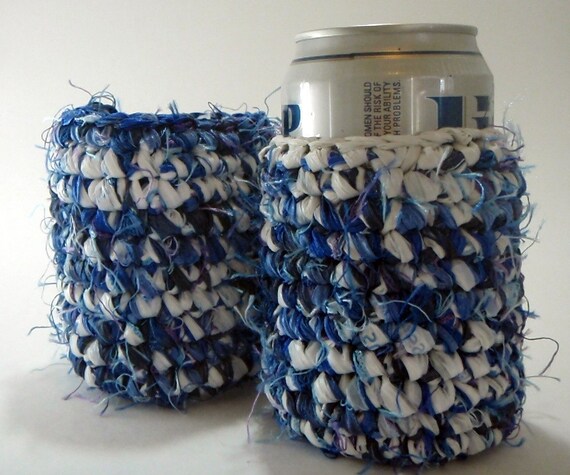
Fun Blue Pair of Ploozies Koozies

Why did you decide to work with upcycled/recycled/repurposed/vintage materials?
I honestly don't remember why I originally started using plarn. I still have the first Ploozie I made, completely out of plarn, and it fits over a typical koozie. My friends thought it was a hoot, and I saw a way to recycle all those grocery bags that always pile up. So, my little industry was born.


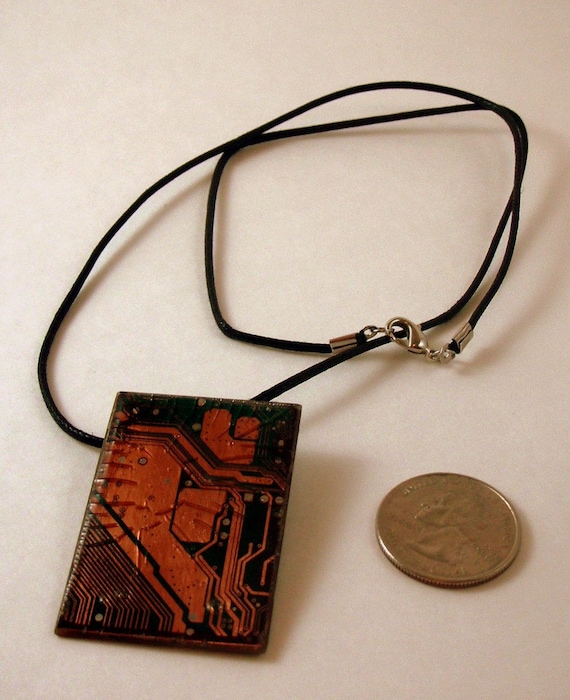
Cracked HeckerBling Necklace

What is your favorite thing about running your Etsy shop?
My Etsy shop allows me to keep creating, and creating helps reduce my stress level. I have also met so many wonderful and creative people through my Etsy shop who help inspire me.


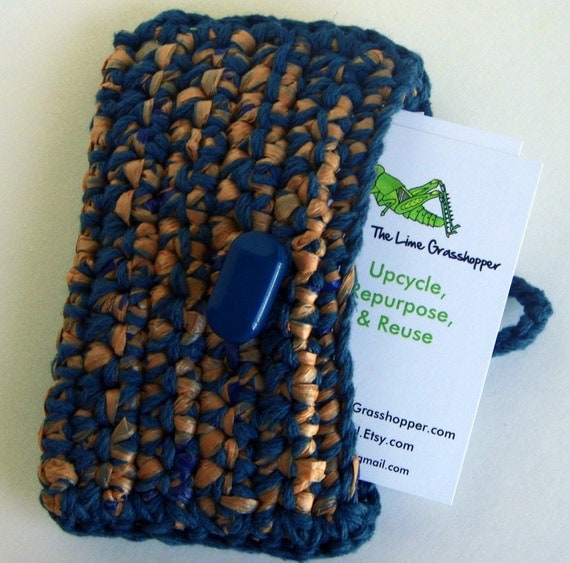
Deep Turquoise and Tan Plarn and Yarn Wallet

What inspires you to create/sell what you do?
My inspiration comes from keeping some "trash" from clogging up our landfills, and keeping our beaches clean. I love to see the looks of wonder and awe when people find out something used to be a plastic grocery bag, or the motherboard of a computer, or a shell I found while kayaking. I don't necessarily create to sell for the money. It is such fun to introduce people to the wonders of upcycling and repurposing.

Share links to where we can find you on the web
website / Blog - http://limegrasshopper.com
Facebook - http://facebook.com/thelimegrasshopper

Thanks for sharing Lexan!

See your next week,
Valerie
Everyday Inspired Blog

March 22, 2011

Tuesday's Treasuries! Spring has Sprung~ Time for FUN!

It brings out the best in us, the youth in us, and it revives our spirit: It's Spring!


Re-FUN-ished by Walter Silva~


Spring Cycle by Plucking Pendants~


abcdefgreen...exploring Teamupcyclers by bottlecrop~


a Spring in my SteP by collagical~

March 21, 2011

Monday's Makeover!

Mary, Mary, quite contrary~ How does Your garden grow? With the first official full day of Spring in bloom, it's time to finally head outdoors and enjoy the sunshine. But what if your space isn't so inviting...Neither were these, until a little makeover magic took place~


From MyHomeIdeas.com, this "Peaceful" space was featured in their Amazing Home Makeover Series~


And here's an upcycling DIY makeover project from Studio G~


If you really feel like taking on a DIY doozie~ try upcycling some pallets into an outdoor seating area! Upcycling guru, Wendy Tremayne will walk you through it in her tutorial~


Have a great idea for a garden makeover or upcycling project? Share it with us here or check out our Facebook page and share there!

March 18, 2011

Love 2 DIY on the Weekend: Upcycled Ribbon Spool

So my daughter and I are officially hooked on finding cute, fun, easy projects to share with you guys. When I first made this commitment to guest post on Love2Upcycle I honestly didn't imagine it would become a mother daughter adventure. Luckily it has - and she found this cute upcycle project in a magazine so we had to do it. I decided we would each do our own to show two alternate styles, and to hopefully show you how it easy it is to make one of my tutorials into your own personal project.

First we separated the top and bottom from the spool. We tried to cut it, use a knife - nothing was working. Then Vanessa just said, "why don't we just pull it?" and ta-da, it worked!

This ribbon was 1.5" but any size will work!

Next we measured and cut our coverings. Vanessa chose lightweight fabric scraps and I cut a few black and white pictures from an old art book I've been using for projects just like this. We actually used fabric glue which didn't work so well on the paper and it bled through a little bit on the fabric. I would recommend a heavier fabric so you don't have that problem.

These are pretty cute as they are, I think!

This is the part we go crazy. I bought some jewelry making pieces (clasps, etc) at a local antique mall and they threw in these crazy rhinestones. I didn't have the slightest clue as to why I would ever use them. Vanessa found a way.

Easy enough for an 8 year old but fun enough for grown-ups!
I am a little less into the bling and more into understated elegance. Okay, well that's a lie. I'm more into cheap and cute with muted colors. But my spool turned out very nice. Simple, understated, elegant.

I'm in love with this! 
Just imagine 3 or 5 or 7 of these on your craft room shelf. Everyone will ask where you got them! You don't even have to tell them an 8 year old could do it!

Perfect for buttons! 

Sammi