Showing posts with label DIY. Show all posts

July 27, 2013

Love 2 DIY on the Weekend~ Is For the Birds!

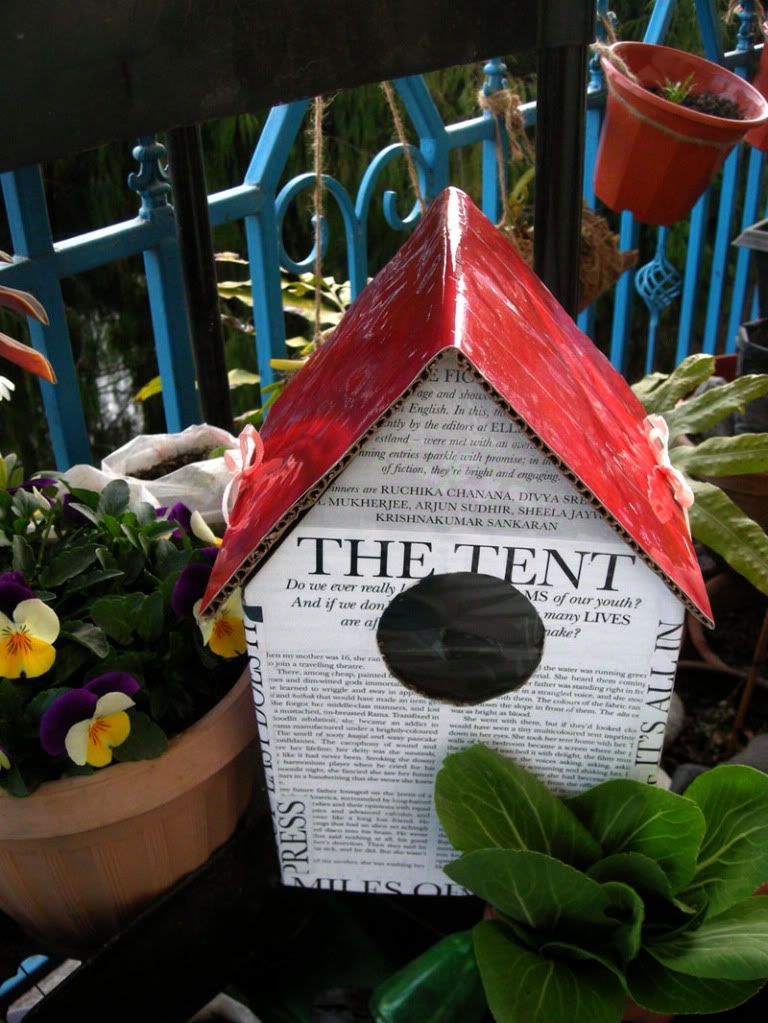
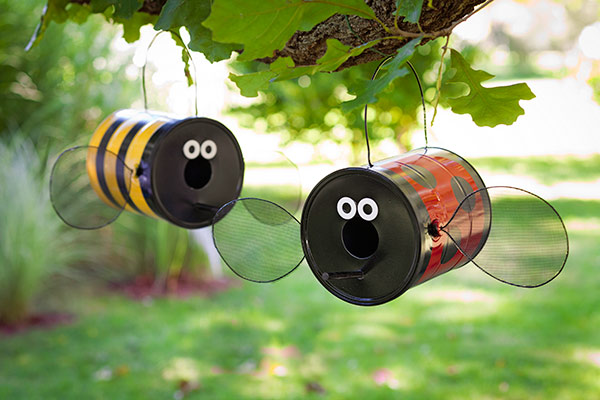
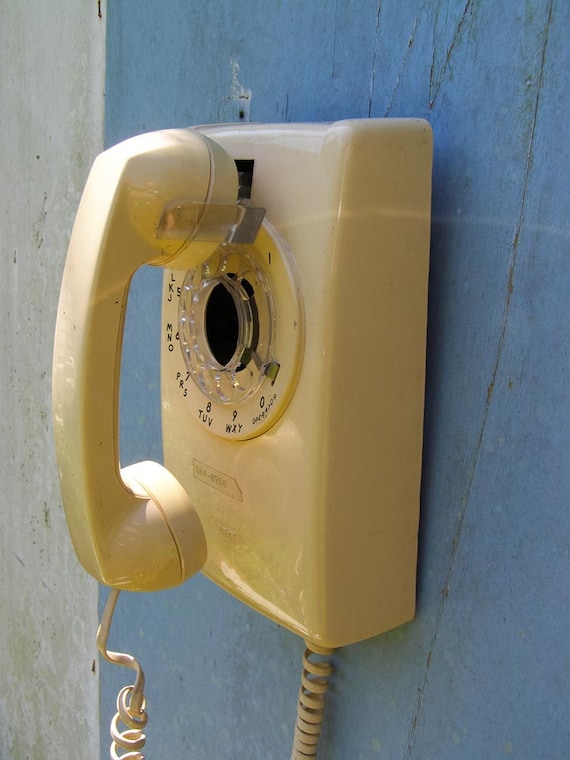
If you love birds in your backyard habitat, we've got some way out and somewhat, wacky upcycled inspiration for some cool habitats for your winged visitors~ If you don't want to DIY, some of these birdhouses are available for sale in the artist's studio or online shop.


Brian Carlisle~ GadgetSponge.com


It's a Crazy Life...what craft is Sam working on now?


The Guilty Crafter~ confessions of a domestic Goddess wannabe


Upcycled Garden Style...a website from Gardens Inspired


April Crafternoon@ fdlpl.org


Tale of Twisted Fibers


Mama's Nook


EcoCycled


So look around your garage, basement or attic and turn an old treasure or tossed away article into an upcycled home for your feathered friends!

Have a fantastic weekend!
;) Cat

June 8, 2013

Love 2 DIY on the Weekend~ Make a Gift for DAD!

What's better?

Another tie?

Or a handmade gift?

You know Upcyclers is all about handmade, so I'm sure you also know we recommend making something for Dad! Here's some great ideas I found that can get the kids' creative juices going and make Dad smile on his special day!


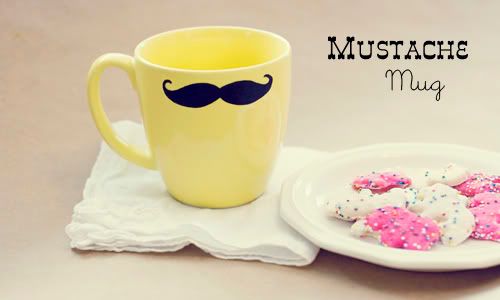
Mustache Mug Tutorial from The Tortoise and the Hare


Repurposed Tree Branch Tutorial from TRAASH!


The Mother Huddle.com


DIY Coasters from BHG.com


Office Organizer from BHG.com


Altoid's Tin Tool Box


Father's Day Trophies from smART Class


So there you go, lots of ways to let Dad know he's King for a Day~ Now go get your DIY on and Enjoy your Weekend!

;) Cat

May 26, 2013

Love 2 DIY on the Weekend: Summer Projects!

Summer is great for sun and fun, but it's also the best time of the year to get your DIY on! Here are tons of different projects you can tackle every weekend this Summer!


Repair the World~ DIY Summer - Eco-Friendly Projects for Everyone

30 Days of Easy Summer DIY with Bob Vila

Great Ideas~ 22 Summer Decoration, DIY and Inspiration Projects!


33 DIY Ways to Have the Best Summer Ever from BuzzFeed


15 Outdoor DIY Projects for Summer from Arpartment Therapy


DIY Fun Summer Projects On Pinterest from Christina Tran


April 29, 2013

Upcycled Linky Party {6}

I don't know about you, but I was thoroughly entertained by last week's linky party!  It was so hard to pick projects to feature this time around.  So if you missed the fun last week be sure to go back and see all the projects that were linked up.  Difficult or not, I had to choose.  I decided to go with the absolutely never seen before projects starting with these window people by the Eclectic Red Barn:


Be sure to hop over and see how the heads were made, very clever indeed!

And then there is this cottage chic window valance made from a piece of picket fence.  Swing over to Grandparents Plus to see how to make your own!


And, finally, our featured project this week comes to us from PlaynWithScraps.  Check out this Pillow Doll made from scraps of fabric and ribbons.  I just love his little bow tie.


Now on to Linky Party #6.  Here's the run down on the rules:

1.  Feel free to link up no more than one upcycled tutorial that you created and one upcycled item from your shop each week.
2.  Please don't link up the same items or blog posts as in previous weeks, let's keep it fresh.
3.  Follow Love 2 Upcycle by email or Google connect.
4.  This is a party so socialize!  Visit at least one shared link and leave a meaningful comment or "favorite" it if it is an Etsy shop item.  It would be nice if you followed them as well, but it is not required.
5.  Please keep it family friendly and upcycled!  We reserve the right to remove any links that aren't appropriate.

Now, show us what ya got:

April 22, 2013

Upcycled Linky Party {5}

Happy happy Earth Day!  Last weeks Upcycled Linky Party had some great upcycled projects and shop items.  With warmer weather here, it's time to break out the Tees and Tanks.  Here are some highlights from last week that will help you stay in fashion while living a little greener.

I love this one from Upcycled Design Lab and think it's great for the T-shirt that has a stain that needs hiding:


And EtsyFEST showed us a quick way to transform a T-shirt into a cool tank top


This weeks shop highlight is this super "cutie" license plate sign from Sweet Someday:


Now on to Linky Party #5.  Here's the run down on the rules:

1.  Feel free to link up no more than one upcycled tutorial that you created and one upcycled item from your shop each week.
2.  Please don't link up the same items or blog posts as in previous weeks, let's keep it fresh.
3.  Follow Love 2 Upcycle by email or Google connect.
4.  This is a party so socialize!  Visit at least one shared link and leave a meaningful comment or "favorite" it if it is an Etsy shop item.  It would be nice if you followed them as well, but it is not required.
5.  Please keep it family friendly and upcycled!  We reserve the right to remove any links that aren't appropriate.

Now, show us what ya got:

April 15, 2013

Upcycled Linky Party {4}

Welcome back to our Upcycled Linky Party - weekly party #4.  Before we dive in, let's take a look at a few highlights from last week.

The Wooden Bee showed us how to turn a few ordinary thumb tacks into extraordinary thumb tacks with a bit of wine cork.  Be sure to swing by her blog to see how you can make a set of your own:


Whether you're the creative type who exhibits their work at art and craft fairs and need a fabulous way to send purchases home with your customers or you're looking for a unique way to present a birthday gift, look no further than this. I've taken a few items from the recycle bin; newspaper, cereal box and some T-shirt yarn to create this fun and colorful gift bag.  Be sure to check out the tutorial.


And just in case you need a little more cork in your life (along with a few bottle caps), this week's shop feature comes to us from Our Children's Earth.  These Friendly Snakes are the cutest, don't you think?


Now on to Linky Party #4?  Here's the run down on the rules:

1.  Feel free to link up no more than one upcycled tutorial that you created and one upcycled item from your shop each week.
2.  Please don't link up the same items or blog posts as in previous weeks, let's keep it fresh.
3.  Follow Love 2 Upcycle by email or Google connect.
4.  This is a party so socialize!  Visit at least one shared link and leave a meaningful comment or "favorite" it if it is an Etsy shop item.  It would be nice if you followed them as well, but it is not required.
5.  Please keep it family friendly and upcycled!  We reserve the right to remove any links that aren't appropriate.

Now, show us what ya got:

April 1, 2013

Upcycled Linky Party {2}

No better time to party than on a Monday, right?  We had some terrific entries, I really loved what everyone linked up.  But, I've been tasked the difficult decision of which links to highlight.  So, before we get to all of the April Foolin' around, here are some highlights from last week's party.

I loved this simple repurpose of a toolbox and some tin cans into an Art Caddy.  Be sure to visit Christine over on her blog Little Brags for all the details.


 And then there's this one, I had to highlight this project because it was such a clever upcycle and you can't fully appreciate it with just a glance.  So for those of you who didn't click through last week, check out these earrings from Wildcraft Vita.  They are made from real pressed daisies and squashed Nespresso capsules! Be sure to visit her blog to see how she made them.


 And finally, a Etsy shop highlight comes from Goat and Kettle.  The ring is made from an actual vintage VW key.  They don't make keys like that anymore!


Now for Linky Party #2, here are the rules:

1.  Feel free to link up no more than one upcycled tutorial that you created and one upcycled item from your shop each week.
2.  Please don't link up the same items or blog posts as in previous weeks, let's keep it fresh.
3.  Follow Love 2 Upcycle by email or Google connect.
4.  This is a party so socialize!  Visit at least one shared link and leave a meaningful comment or "favorite" it if it is an Etsy shop item.  It would be nice if you followed them as well, but it is not required.
5.  Please keep it family friendly and upcycled!  We reserve the right to remove any links that aren't appropriate.

Show us what ya got:


March 25, 2013

Introducing, an Upcycled Linky Party!

That's right, Monday is party day here on Love 2 Upcycle and we invite you to link up and share your latest upcycled creations.  As with most linky parties and blog hops, this party has a few rules and here they are:

1.  Feel free to link up no more than one upcycled tutorial that you created and one upcycled (or vintage) item from your shop each week.
2.  Follow Love 2 Upcycle by email or Google connect.
3.  This is a party so socialize!  Visit at least one shared link and leave a meaningful comment or "favorite" it if it is an Etsy shop item.  It would be nice if you followed them as well, but it is not required.
4.  Please keep it family friendly and upcycled!  We reserve the right to remove any links that aren't appropriate.

Follow these simple rules and your project may be featured next week.  Now party on....

March 10, 2013

Love 2 DIY on the Weekend~ The Everything Soap Blog!

You know how much I love telling you about FREE stuff on Fridays? Well, last Friday, Courtney from The Everything Soap Blog shared a free recipe for a "Luxury Cold Process Shampoo Bar"!

Here's Courtney's original post from her blog:

Luxury Cold Process Shampoo Bar Recipe


This is one of my absolute favorite luxury shampoo bar base recipes. To it, you can add any colors and essential oils you think you would like. I call the base my “Avocado Shea” base. It’s pretty much a staple in my solid shampoo line. You’ll find variations that I create all the time.

I always like to create my own recipes. This is a very unique 100% luxury base. Every single additive serves the purpose of moisturizing and adding luster to dull locks. Please remember that I’m sharing this recipe for personal use only.

Ingredients by Weight
16 ounces avocado oil
11 ounces unrefined shea butter
8.25 ounces cocoa butter
8.25 ounces castor oil
5.5 ounces sweet almond oil
4 ounces jojoba oil
2 ounces olive oil
6.789 ounces Sodium Hydroxide
18.15 ounces aloe vera liquid

Optional
Any colorants you’d like to add
Up to 9 tablespoons essential oils - any blend you want

Mix Temp: 110 degrees
Rest Time Before Cutting: 3 days
Cure Time: 8 weeks

This recipe is going to create a solid shampoo bar batch of approximately 80 ounces [5 pounds].


If You’re New - A Newbie Guide


Safety
Please use all safety precaution. Making solid shampoo bars can be insanely dangerous if you don’t know what you are doing. Never work around pets or kids, work in a well-ventilated area. In fact, the first few hundred times you create a solid shampoo, work outside just to be safe. Always where a protective apron, gloves and eye gear. Always have all of your ingredients pre-measured and ready to go. Take your time. Be careful. Never reuse your hardware for cooking. Set them in a special area and only use them for creating cold process products in the future.

Hardware [besides all the safety gear]
Large glass measuring cup that handles high temperatures
5 pound cold process flexible soap Mold
Large sauce pan
2 candy thermometers

Directions
In a large sauce pot, bring the avocado oil, shea butter, cocoa butter, castor oil, sweet almond oil, jojoba oil and olive oil to 110 degrees, and hold it there.

In a separate measuring cup filled with your sodium hydroxide, slowly and carefully add your aloe vera liquid. Keep your face away from the mixture and don’t breathe in the puff of smoke it makes. Slowly and carefully stir and let it sit, stir a little more and repeat until the mixture comes down to 110 degrees.

Take both of your mixtures that are holding a steady 110 degrees, and VERY carefully add the sodium hydroxide mixture to the oils. Using a stick blender, carefully blend until the mixture becomes trace.


What is Trace: Trace is when the soap mixture is thickened. You should be able to stir and see the stir marks for a few seconds before they blend back into the mixture.


If you’re adding any essential oils or colorants, add them now.

Pour gently into your mold. Wrap your little baby in towels and place in a dark place that isn’t too warm, or too cold and that isn’t too humid. You want it to cool down nice and slow. Leave it alone, AND DON’T PEEK AT ALL, for three days. I know…it will make you crazy. Just forget about it.

After three days, carefully pop your soap loaf out of the mold and cut into slices. It will look and feel like a fresh cheese. Nice and easy to handle. Don’t handle it with your hands. Use gloves and all of your safety gear. Set the slices on a wire rack in a not to cold, not to warm, dark place. You’re going to let them cure for 8 weeks before using them, turning them every week.


Check Out the Milk & Honey Naturals Solid Shampoo Line

November 9, 2012

Love 2 DIY on the Weekend~ Upcycling Holiday Ideas!

We told you it's beginning to look like an Upcycled Christmas last week~ Here's some ideas for you to make yourself and bring some upcycled Christmas decorations into the picture!

Upcycled Soda Bottle Penquins by Lucy from Craftberry Bush

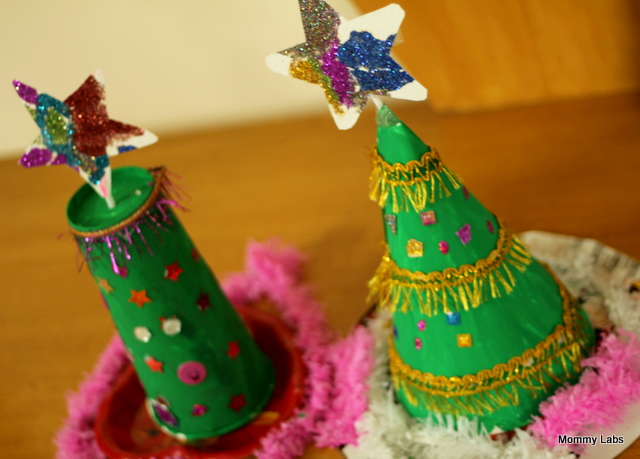
Upcycled Christmas Tree Project from Mommy Labs


How about creating a tree from plastic bottles using an innovative kit from Design Pack Gallery~


Eco Friendly Christmas Wreath Ideas from Good Housekeeping

All Natural Fruit Ornaments from Good Housekeeping


Upcycled Cardboard Holiday Village Houses from even*cleveland


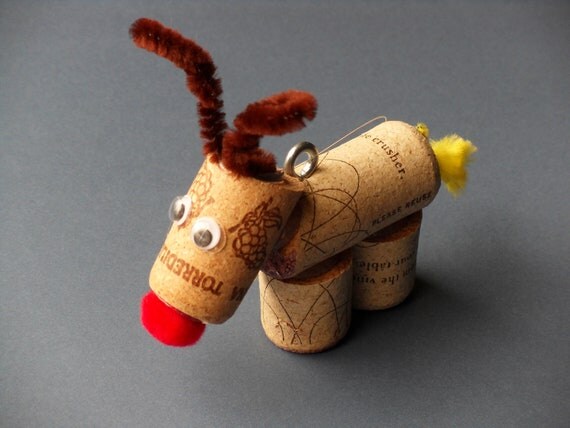
Upcycled Wine Cork Reindeer Ornament by Kim Bradley on Etsy


Upcycled Christmas Ornament Ideas on Pinterest


So look around you and see what you might be missing as potential craft materials~ Take on a DIY project this weekend and creatively reuse something --- UPCYCLE it into a cheery and festive Christmas decoration!

August 30, 2012

eco crafting: Wine Cork Magnets

 
How to Make Wine Cork Magnets
 

Materials needed:

Oak Wine Corks
Drill
Glue
Magnets
 
This is a messy project because of the cork that will be removed with the drill, so I would definitely cover an area, or do this project outside. Let’s get started…
 
 
First decide which side of your oak cork you would like to be the front of the magnet. You will drill a hole for the magnet on the opposite side. The size of the drill bit doesn’t really matter (unless it is bigger than your magnet). You are going to use the drill to dig out a shallow hole the size of the magnet.
 
 
Don’t worry the holes don’t have to be perfectly circular or anything special. As you dig out the cork with the drill you can stop and check to see if the magnet is fitting. You want the magnet to fit in flush with the cork. If you drill or dig too deeply into the cork, don’t worry either, that’s what the glue is for. I use both sides of an old paint brush to help get extra pieces of cork out of the way as I’m drilling.
 

Magnets


There are several magnets you can use. I selected Neodymium Rare Earth Magnets, size 3/8 x 1/16. I purchased a set from a cute little Etsy shop. Each little magnet can pull a little over 2 pounds and holds down several sheets of paper . What is important in magnet selection, is that they are stronger enough to hold what you would like, and small enough to fit nicely into your cork.
 

Glue

 
Now, we are ready to glue. I would recommend an industrial strength glue, like E-6000. It dries clear and is strong enough to hold the magnet to the cork while it is in use. I also like it because E-6000 is waterproof, non-flammable and washes off my hands easily. Just fill the drilled hole with glue and place the magnet in the center. If some glue oozes out or gets on the magnet, don’t worry it will peel off the metal when it is dry.
 
It is important to note here that the magnets will attract to each other while you are doing this project. Once glue has entered the picture, I would keep the corks with magnets drying in them, far away from other corks with magnets drying in them! I used some wood molding sticks to separate them, but you can use plates, cups, anything that would help separate the corks while keeping them face down (magnet up) to dry. E-6000 recommends you let the glue dry 24-72 hours. I found after 24 hours all was dry and ready for use.
 
 
This project allows you to showcase special wine corks. Like corks that are from a rare bottle of wine on a special anniversary, or unique corks that have pretty markings. I like to use oak wine corks that have natural wine staining on the ends.
 
 
Happy Wine Corking!
 
 
Check out my blog for more wine cork ideas, uses, and tutorials!
 
Thanks, Bee
The Wooden Bee